Friday, November 23, 2012

How to recover lost password in Ubuntu???

ubuntu logo
 
Ubuntu, which is more secure and flexible way to work with but what if you lose your account password which is used to login to your user account. So why do you lose your password!! well there are many reasons like you may forget what password you selected during the ubuntu installation process or you may forgot your password because there are too many passwords to remember and etc.., Well if this is your problem too then this post will help you.

To recover your lost ubuntu password follow these simple steps.
 
  • Just reboot your system and enter boot menu.
  • If your are good ubuntu user and had a single boot i.e ubuntu is the only OS on your computer them press and hold Shift key while booting, thus you can see some boot options.
  • If you are dual boot i.e you use windows/mac/other Linux distribution along with ubuntu then you can automatically see some boot options without the need to hold shift key.
  • From boot options select recovery mode.
  • After selecting the recovery mode wait until the boot finishes. Once the process finishes you have to select Drop to root shell prompt in the list in order to reset your password.
  • Once you're in, the things are very easy, just type ls /home
                      Note: Here in "ls" l = lowercase of L but not "i"

  • This gives the list of user accounts, Now type this command and press enter.
                     password username
  • Here replace username with the username you want to reset.
  • Now you will be prompted for a new password, just give your new password(you will not see your password while you type) and press enter, you will be prompted to retype so retype the password again.
  • Now simply type exit and press enter to come back to recovery menu. That's it your done with resetting your password.
  • At recovery menu, select resume normal boot, and now you can login to your ubuntu because you know the password.
 Thanks for visiting my blog plz comment if you like my post.......
Share it.......

Install Ubuntu form usb flash drive...

Bootable ubunut usb flash drive
Ubuntu is one of the best OS which is based on Linux kernel , In this tutorial we are going to learn how to install Ubuntu from USB drive. This procedure is very handy for portable notebooks etc.., which do no have CD/DVD drive and it will be also useful when your CD/DVD dive has been malfunctioned.
I just don't want to be too long, so lets get straight to the work ;)

Requriments:

  • A small application called UNetbootin which you can download from here.
  •   USB drive.
  • Ubuntu ISO, if you dont have ubuntu iso download one from here.
Now Start: 
  • Plug-in your USB drive and make a back up of it because your drive will be formatted in this procedure.
  • Launch UNetbootin by double clicking it.
  • Now select "Diskimage" and browse to the ubuntu iso and select it.
  • Make sure that the "Type" is selected as "USB drive" and also make sure that the drive letter belongs to your USB drive.
  • Now click "OK" and pay some patience till the procedure is completed.
Once the procedure is completed click "EXIT", from now you can install or enjoy live cd right from your USB drive.
 Thanks for visiting my blog plz comment if you like my post.......
Share it.......

Temple Run Game for Android..

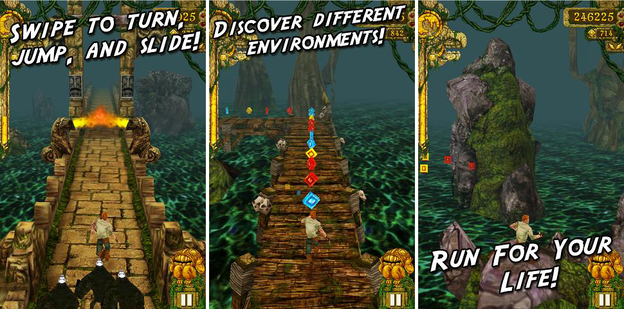
Temple Run which was known as the seconds most downloaded game for iPhone is now ready to make some action on your Android devices. It was downloaded like 40 million times from the app store for iOS devices and now it will make another big record from the Google play market. Main gameplay of this game is that how much can you run from those ugly cave monkeys.

Now getting save from those monkeys is pretty simple you just need to swipe your finders on your screen to which ever side you wanna turn or jump. Now there are coins in the path collect to unlock more power ups and unlocking more characters.
temple-run-game-android

Download Temple Run for Android Devices :-

You can Download Temple Run for Android devices using the market link.  so hope you can manipulate your path and get saved from those ugly monkeys, have fun and enjoy guys.
 
 Thanks for visiting my blog plz comment if you like my post.......
Share it.......

Angry Birds Space Theme for Windows 7 & Windows 8


After banging pigs in Angry Birds Space PC Version now its time to make your desktop angry by transforming it into a high definition Angry Birds home, where these birds will create some secret plans for banging those green ugly pigs muhaah! well this theme come with 10 high quality HD Wallpapers from Angry Birds Space.


So now this theme is available for both Windows 7 and 8, making your desktop fully colorful, setups for both are provided below you can download them.


Have fun guys and make sure to share these theme packs with all your friends so that they can also enjoy these and make their desktop colorful and angry too.
  
angry-birds-space-theme-windows
Thanks for visiting my blog plz comment if you like my post.......
Share it.......

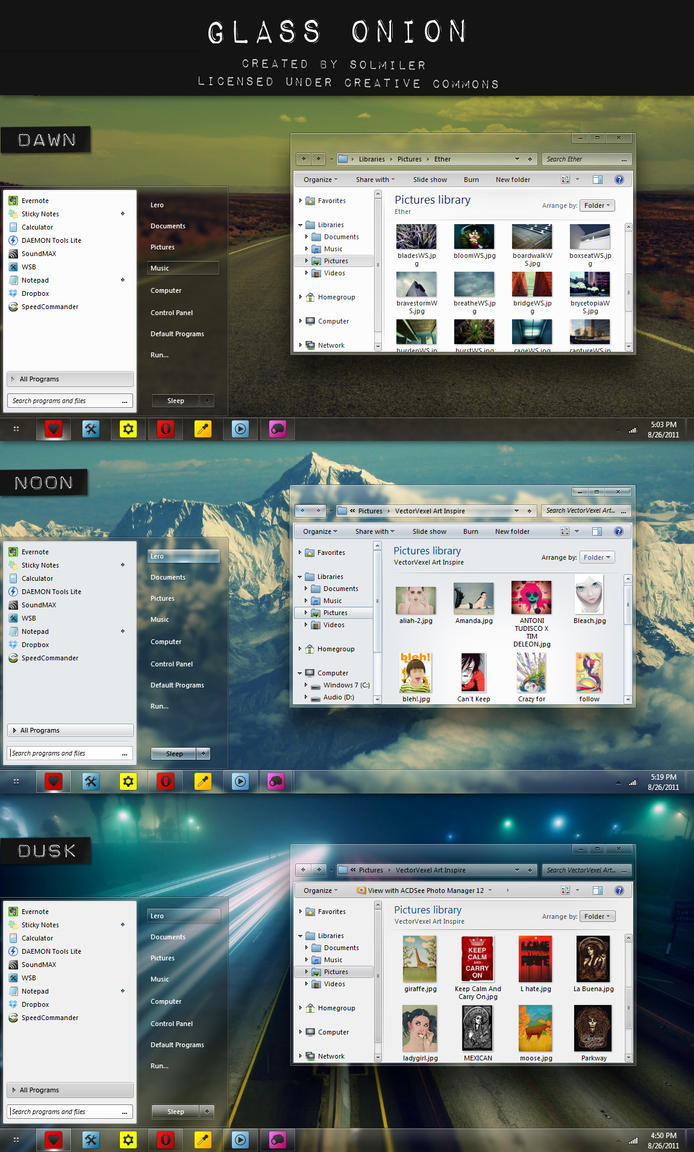
Glass Onion for Windows 7

 
This VS is for Windows 7. It’s tested and working on both 32 and 64-bit versions. System files are for SP1
Three visual styles : Dusk, Dawn and Noon
Support for top, bottom and left taskbar,
Two different fonts: Windows default Segoe UI font and smaller Calibri font.
Beautiful Wallpaper by Lars Bjork, check out His Flicker Page for more great photos
    
 
 Thanks for visiting my blog plz comment if you like my post.......
Share it.......

Transform Windows 7 Into Mango With Mango Skin Pack!!!

 
The all new Windows Phone 7.5 Mango is one of the most promising mobile OS till date. With awesome looks, powerful interface and later when the Apps will also start flowing this OS has the potential of being the biggest OS in future. Although it is going to get stiff competition from iOS and Android but Mango is being by Microsoft and they are the ones who are having maximum experience with building OS’s.
You use Mango Skin Pack 1.0 which is also available for free and compatible withWindows 7.
 
     
 Thanks for visiting my blog plz comment if you like my post.......
Share it....... 

Transform Windows 7 Into Android With Android Skin Pack!!!

 
Initiated later than the iOS, Android has managed to become the most popular in the hand held segment and Tablet as well. With the all new Android Ice Cream Sandwich set to be released soon and an all new impressive GUI being the main attraction we predict Android getting even bigger in coming months.
You can easily Transform your Windows 7 desktop in to Android by using Android Skin Pack 1.0. The good thing about this installer is that it installed all the patches required for the Pack and also installed third party Apps. The result is pretty impressive and a must for all Android lovers.
                                  Download:-  64 Bit 32 Bit
  Thanks for visiting my blog plz comment if you like my post.......
Share it.......

Placebo for Windows 7


Features:-
Eight Visual Styles.
Additional borderless versions
Support for top, bottom and left taskbar,
Two different fonts: Windows default Segoe UI font and s smaller Calibri font.
Basic version of every style.
Support for Theme resource changer – no changing of system files is necessary.


How to Unlock Samsung Corby Phone???


How to Unlock Samsung
Corby Phone
Hi Dear Friends,
Now i am again here to take a good
post for you and many of you users
of Samsung corby mobile phones.
and use codes for your mobile
security and your privacy and may
people among of us input the code
and forget that code which they
input in his/her cell phone .
DON'T WORRY now i am  let you
know that if you forget you Samsung
Corby Phone code.
you can open your phone without
knowing that code.. 
We will go through a process of
steps which are easy to follow.
Just do as i say..


1) To Unlock the phone u have to
put a other network sim which is
not default provider for the phone.
Like if it supports vodafone then try
another sim company like docomo
or any other.

2) Now type this in your mobile
phone *#9998*3323# and this will
reset the phone and push exit and
then press 7.

3) It will reset again and now put
your other sim in it and it will show
you as sim lock, now press 00000000 
(8 zeros) then it should be
unlocked.

4) Now type *0141# and press the
call but now (green button) and
now its unlocked to all networks.

5) Maximum this process will work
for you and it wont work in old
phones of samsung so don’t waste
your time unlocking them.
 
Now if this process didn’t work for
you…. You can follow this steps to
unlock the phone.

1) I have not tested this code so use
at your own risk…

2) For this you have to reset the
phone without sim in it by pressing
*#2767*2878# or *#9998*3855#

And if you want to unlock your
Samsung Corby S3650 then
just follow these steps here : Source
from hyfeno.com

1. Power on your Samsung mobile
phone without the SIM card in.

2. Type #7465625*638*

3. Enter your Samsung unlock code

4. Type #

5. If worked, phone should say
“Network Lock Deactivated”

6. Your Samsung phone may
automatically reboot.
 

Thanks for visiting my blog plz comment if you like my post.......
Share it.......

How To Root Samsung Galaxy Note With One Click On Windows?

Yes, since One Click roots are all the hype nowadays, the Galaxy Note has finally received it’s first One Click rooting script thanks to XDA-Developers. The script has been aptly titled Easy Rooting Toolkit and is meant for use on Windows for now, although we’re sure Linux and Mac will follow up soon enough.
  1. To begin, download the rooting toolkit and extract it on your PC.
  2. Now make sure USB Debugging is enabled on your device. (Settings > Applications > Development.)
  3. Also, make sure to check Unknown Sources in Settings > Applications.
  4. Connect the Galaxy Note to the PC via USB cable and set to to Charge Only mode.
  5. Open the rooting toolkit folder and run runme.bat to begin the rooting process.

 Thanks for visiting my blog plz comment if you like my post.......
Share it.......

Hack Symbian


HACK SYMBIAN S60 FROM NORTON ANTIVIRUS:
Just Follow these Simple Steps and You are ready to hack your  phone within minutes: Step1: Install NortonSymbianHackLDD.sis Step2:   Launch It. Step3:  Go Options- Anti-Virus - Quarantine list Step4: Go Options - Restore All, accept prompt Step5: Exit application, delete from
   App manager (Symantec Symbian Hack). Also 

 delete c:\shared\ folder.

Step6: Install RomPatcherPlus_3.1_LiteVersion.sisx Step7: Launch and apply patches:
  Open4all for full access to file system
  Installserver for installing any 
 unsigned applications.
    

Hacked Successfully, Now you can Install any Apps without 
 
Signing it,
 
Thanks for visiting my blog plz comment if you like my post.
 
Share it.......

Tuesday, November 20, 2012

How To Post A Blank PostIn Facebook ?

How To Post A Blank Post In
Facebook …. .
So Just Follow Belowed Simple
Steps…
1. Go To Facebook Wall Post …
2 . In Post Status Write The
Code Given Below…
      @[0 : 0: ]
Now Post Status …

 Thanks for visiting my blog plz comment if you like my post.......
Share it.......

Monday, November 05, 2012

Trick to open multiple yahoo account!!!

Yahoo Messenger trick-How to
open Multiple Yahoo
Messenger???


1. Go to start > Run > Type regedit
> Press Enter
 

2. Click on the plus sign near the
folder HKEY_CURRENT_USER
 

3. Click on the plus sign near the
folder Software...
 

4. Click on the plus sign near the
folder Yahoo...
 

5. Click on the plus sign near the
folder Pager...
 

6. Right Click on the folder name
Test > New > DWORD Value
 

7. Right side you will get a file
named New Value #1
 

8. Right Click on the file New
Value #1 and Rename it as Plural and
press enter
 

9. Double Click on the file Plural
 

10. You will get a windown
named Edit DWORD Value
 

11. Type 1 inside 'Select the Value
data' and press enter
 

12. Close the registery editor
window
 

13. Now you can launch multiple
windows and use different ID's.


 Thanks for visiting my blog plz comment if you like my post.......
Share it.......

Keyboard shortcut (Microsoft windows)

Keyboard Shortcuts (Microsoft
Windows)

1. CTRL+C (Copy)
2. CTRL+X (Cut)
... 3. CTRL+V (Paste)
4. CTRL+Z (Undo)
5. DELETE (Delete)
6. SHIFT+DELETE (Delete the
selected item permanently without
placing the item in the Recycle
Bin)
7. CTRL while dragging an item
(Copy the selected item)
8. CTRL+SHIFT while dragging an
item (Create a shortcut to the
selected item)
9. F2 key (Rename the selected
item)
10. CTRL+RIGHT ARROW (Move the
insertion point to the beginning of
the next word)
11. CTRL+LEFT ARROW (Move the
insertion point to the beginning of
the previous word)
12. CTRL+DOWN ARROW (Move the
insertion point to the beginning of
the next paragraph)
13. CTRL+UP ARROW (Move the
insertion point to the beginning of
the previous paragraph)
14. CTRL+SHIFT with any of the
arrow keys (Highlight a block of
text)
SHIFT with any of the arrow keys
(Select more than one item in a
window or on the desktop, or
select text in a document)
15. CTRL+A (Select all)
16. F3 key (Search for a file or a
folder)
17. ALT+ENTER (View the
properties for the selected item)
18. ALT+F4 (Close the active item,
or quit the active program)
19. ALT+ENTER (Display the
properties of the selected object)
20. ALT+SPACEBAR (Open the
shortcut menu for the active
window)
21. CTRL+F4 (Close the active
document in programs that enable
you to have multiple documents
opensimultaneously)
22. ALT+TAB (Switch between the
open items)
23. ALT+ESC (Cycle through items
in the order that they had been
opened)
24. F6 key (Cycle through the
screen elements in a window or on
the desktop)
25. F4 key (Display the Address
bar list in My Computer or
Windows Explorer)
26. SHIFT+F10 (Display the
shortcut menu for the selected
item)
27. ALT+SPACEBAR (Display the
System menu for the active
window)
28. CTRL+ESC (Display the Start
menu)
29. ALT+Underlined letter in a
menu name (Display the
corresponding menu) Underlined
letter in a command name on an
open menu (Perform the
corresponding command)
30. F10 key (Activate the menu
bar in the active program)
31. RIGHT ARROW (Open the next
menu to the right, or open a
submenu)
32. LEFT ARROW (Open the next
menu to the left, or close a
submenu)
33. F5 key (Update the active
window)
34. BACKSPACE (View the folder
onelevel up in My Computer or
Windows Explorer)
35. ESC (Cancel the current task)
36. SHIFT when you insert a CD-
ROMinto the CD-ROM drive
(Prevent the CD-ROM from
automatically playing)
 

Dialog Box - Keyboard Shortcuts
1. CTRL+TAB (Move forward
through the tabs)
2. CTRL+SHIFT+TAB (Move
backward through the tabs)
3. TAB (Move forward through the
options)
4. SHIFT+TAB (Move backward
through the options)
5. ALT+Underlined letter (Perform
the corresponding command or
select the corresponding option)
6. ENTER (Perform the command
for the active option or button)
7. SPACEBAR (Select or clear the
check box if the active option is a
check box)
8. Arrow keys (Select a button if
the active option is a group of
option buttons)
9. F1 key (Display Help)
10. F4 key (Display the items in
the active list)
11. BACKSPACE (Open a folder one
level up if a folder is selected in
the Save As or Open dialog box)
 

Microsoft Natural Keyboard
Shortcuts

1. Windows Logo (Display or hide
the Start menu)
2. Windows Logo+BREAK (Display
the System Properties dialog box)
3. Windows Logo+D (Display the
desktop)
4. Windows Logo+M (Minimize all
of the windows)
5. Windows Logo+SHIFT+M
(Restorethe minimized windows)
6. Windows Logo+E (Open My
Computer)
7. Windows Logo+F (Search for a
file or a folder)
8. CTRL+Windows Logo+F (Search
for computers)
9. Windows Logo+F1 (Display
Windows Help)
10. Windows Logo+ L (Lock the
keyboard)
11. Windows Logo+R (Open the
Run dialog box)
12. Windows Logo+U (Open Utility
Manager)
13. Accessibility Keyboard
Shortcuts
14. Right SHIFT for eight seconds
(Switch FilterKeys either on or off)
15. Left ALT+left SHIFT+PRINT
SCREEN (Switch High Contrast
either on or off)
16. Left ALT+left SHIFT+NUM
LOCK (Switch the MouseKeys either
on or off)
17. SHIFT five times (Switch the
StickyKeys either on or off)
18. NUM LOCK for five seconds
(Switch the ToggleKeys either on or
off)
19. Windows Logo +U (Open
Utility Manager)
20. Windows Explorer Keyboard
Shortcuts
21. END (Display the bottom of the
active window)
22. HOME (Display the top of the
active window)
23. NUM LOCK+Asterisk sign (*)
(Display all of the subfolders that
are under the selected folder)
24. NUM LOCK+Plus sign (+)
(Display the contents of the
selected folder)
25. NUM LOCK+Minus sign (-)
(Collapse the selected folder)
26. LEFT ARROW (Collapse the
current selection if it is expanded,
or select the parent folder)
27. RIGHT ARROW (Display the
current selection if it is collapsed,
or select the first subfolder)


Shortcut Keys for Character Map
After you double-click a character
on the grid of characters, you can
move through the grid by using
the keyboard shortcuts:

1. RIGHT ARROW (Move to the
rightor to the beginning of the
next line)
2. LEFT ARROW (Move to the left
orto the end of the previous line)
3. UP ARROW (Move up one row)
4. DOWN ARROW (Move down one
row)
5. PAGE UP (Move up one screen
at a time)
6. PAGE DOWN (Move down one
screen at a time)
7. HOME (Move to the beginning
of the line)
8. END (Move to the end of the
line)
9. CTRL+HOME (Move to the first
character)
10. CTRL+END (Move to the last
character)
11. SPACEBAR (Switch between
Enlarged and Normal mode when a
character is selected)
 

Microsoft Management Console
(MMC)
Main Window Keyboard Shortcuts

1. CTRL+O (Open a saved console)
2. CTRL+N (Open a new console)
3. CTRL+S (Save the open console)
4. CTRL+M (Add or remove a
console item)
5. CTRL+W (Open a new window)
6. F5 key (Update the content of
all console windows)
7. ALT+SPACEBAR (Display the
MMC window menu)
8. ALT+F4 (Close the console)
9. ALT+A (Display the Action menu)
10. ALT+V (Display the View menu)
11. ALT+F (Display the File menu)
12. ALT+O (Display the Favorites
menu)
 

MMC Console Window Keyboard
Shortcuts

1. CTRL+P (Print the current page
or active pane)
2. ALT+Minus sign (-) (Display the
window menu for the active
console window)
3. SHIFT+F10 (Display the Action
shortcut menu for the selected
item)
4. F1 key (Open the Help topic, if
any, for the selected item)
5. F5 key (Update the content of
all console windows)
6. CTRL+F10 (Maximize the active
console window)
7. CTRL+F5 (Restore the active
console window)
8. ALT+ENTER (Display the
Properties dialog box, if any, for
theselected item)
9. F2 key (Rename the selected
item)
10. CTRL+F4 (Close the active
console window. When a console
has only one console window, this
shortcut closes the console)
 

Remote Desktop Connection
Navigation

1. CTRL+ALT+END (Open the
Microsoft Windows NT Security
dialog box)
2. ALT+PAGE UP (Switch between
programs from left to right)
3. ALT+PAGE DOWN (Switch
between programs from right to
left)
4. ALT+INSERT (Cycle through the
programs in most recently used
order)
5. ALT+HOME (Display the Start
menu)
6. CTRL+ALT+BREAK (Switch the
client computer between a window
and a full screen)
7. ALT+DELETE (Display the
Windows menu)
8. CTRL+ALT+Minus sign (-) (Place
a snapshot of the active window in
the client on the Terminal server
clipboard and provide the same
functionality as pressing PRINT
SCREEN on a local computer.)
9. CTRL+ALT+Plus sign (+) (Place
asnapshot of the entire client
window area on the Terminal
server clipboardand provide the
same functionality aspressing ALT
+PRINT SCREEN on a local
computer.)
 

Microsoft Internet Explorer
Keyboard Shortcuts

  • CTRL+B (Open the OrganizeFavorites dialog box)
  • CTRL+E (Open the Search bar)
  • CTRL+F (Start the Find utility)
  • CTRL+H (Open the History bar)
  • CTRL+I (Open the Favorites bar)
  • CTRL+L (Open the Open dialogbox)
  • CTRL+N (Start another instanceof the browser with the same Web address)
  • CTRL+O (Open the Open dialogbox,the same as CTRL+L)
  • CTRL+P (Open the Print dialogbox)
  • CTRL+R (Update the currentWeb page)

 Thanks for visiting my blog plz comment if you like my post.......
Share it.......

Thursday, October 04, 2012

Snagit 10+key

Features List 
Capture Anything

Enhance Your Images

Work Efficiently
Save, Share, or Send

Efficiently share your images and videos. New Outputs

Save, share, or send your image and video captures to anyone with a variety of outputs. Easily send your image captures to the usual lot, or now share to Facebook, Twitter, and Evernote too. When you’re done recording or capturing a screen video, you can choose to send your video to Camtasia Studio for editing or Screencast.com, YouTube, FTP, Facebook, or Twitter for easy sharing.


Macromedia Dreamweaver 8+key


Macromedia Dreamweaver 8 is the industry-leading web development tool, enabling users to efficiently design, develop and maintain standards-based websites and applications. With Dreamweaver 8, web developers go from start to finish, creating and maintaining basic websites to advanced applications that support best practices and the latest technologies.


Macromedia Dreamweaver is one of the most popular web-design programs in the industry. It allows you to develop professional websites and its user-friendly interface, tools and features have made it the must-have package for web designers.

Dreamweaver uses both Cascading Style Sheets (CSS) and Hyper Text Markup Language (HTML) and it has good code-editing support features that will help you to write the CSS and HTML. Alongside writing the code, you can use the visual layout tools to build your sites and make them look exceptional.


You can use plug-ins to place videos, music and other media into web pages. If you want a site that is easy to update, then you can embed a live stream of content by using RSS.


Pros
Dreamweaver 8 is easy to use and has lots of great new features. It allows you to use CSS and RSS to make your sites look better than ever.

Cons
Some users have reported a problem with the file-time stamp in Dreamweaver 8, which made it difficult to know when a file was last worked on. This was fixed with the 8.0.1 update though.

Conclusion
Using Macromedia Dreamweaver to create websites is much more fun than simply writing code from start to finish. Using its many tools and features will help you to create much more sophisticated pages too. Being able to add media and RSS feeds will make your sites stand out from more ‘flat’ ones that just provide a few words and pictures.            
 The price of Macromedia Dreamweaver 8 is $399 all over the internet. we are giving the full version with serial keys Free here.       
        

Wednesday, October 03, 2012

Create Amazing Text Ascii Art in Many Different Fonts

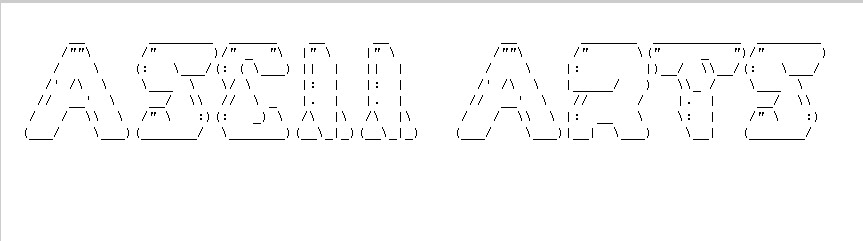
Text Ascii Art are just a bunch of normal text joined together to bring a cool 3D design, its helpful in embedding into websites as it does not take any space and also reveal a good look. Well now in whatever way you wanna use it you can use this to create some cool 3D text designs. Patorjk brings Text Ascii Generator with many different fonts capability. So now you can create in like 100+ fonts.

Text Ascii Generator comes with a nice options set which you can tweak to bring more appealing looks to your name. Like you can change fonts, alignment and much more.
So as you will tweak your settings side by side you will see that preview window below is updating constantly, so whenever you will change font it will change it designs. So there are many fonts so it will be a headache for you to check all one by one so they also have another amazing option called “Test All” which automatically displays all fonts styles aligned one below one.
So like this you will get the preview below your settings panel, they also have a option to save your text into a image file so just one click can convert this text file into an graphic file which you can import into your Photoshop or any other graphic designing software to manipulate it and bring more energy to it.
So now if you like it and you wanna create your own Text Ascii Desigsn than you can visit itsOfficial Page and create some good Text Ascii Designs.