Saturday, January 26, 2013

Download Any Torrents File Using IDM

Hello To All Friends . I hope you all are fine today i am share a simple and easy trick and tips to download any torrent files using Internet Download Manager (IDM). Just Follow The Given Below steps for do this.
  • First You search for your file which you want to download or any torrents files search engine like www.torrentz.eu and search for the file which you need to download.
  • In Next Step is to grab the torrent (.torrent) extension file and save it in your own pc . now just save it on your desktop now you go to zbigz.com
  • Click on upload and upload the torrent file that you need to download previous step.
  • After uploading it and click on go button
  • Now you wait for sometime till zbigz.com is caching the torrent file. kindly be patient at this step as it may take some time depending upon the size of your torrent file and speed of your internet connection . 
  • After your files will be ready for download and you can click on download button in the form of and arrow going in the down direction so that your files start downloading with idm.
  • After a window will ask you that you want to download free or premium . now it's depend on your choice. mostly probably go for free . so click on free button and idm download will pop up and your downloading starts .

Trick to make your computer speak !!!

 
Hi friends,here is an amazing trick to make your computer speak.This trick is working on all microsoft operating system and does not require any programming skills.You have to follow just simple steps and your own Text to Voice software will be ready.If you show this software to any of your friends he will be certainly impressed with you .
FOLLOW STEPS :
  • Open Notepad and copy and paste the following code into it
Dim message, sapi
message=InputBox("What do you want me to say? Powered by Marvel TECH SPOT","Speak to Me [BY- Marveltechspot.Blogspot.Com]")
Set sapi=CreateObject("sapi.spvoice")
sapi.Speak message

  • Save the notepad file with the name speak.vbs at your desktop.
  •  Now your own Text to Voice software is ready.
 
  • Now double click on speak.vbs type in the box whatever you want your computer to speak for you.

Simplest Way To Type Special Characters

special characters
Wanted to type special characters such as ® © ¼ ½ ™ ȇ ǎ À ¿ ? You don't need to memorize any codes because Windows have already built-in a simple tool for this.
  • Start > Run.
  • Type 'charmap' and press Enter.
      type special characters
  • The character map will be shown. Double click any character that you want to select it, then click 'Copy' to copy and paste it to anywhere you want :)
End Note
If you highlight a character, the shortcut code for it will be shown at the bottom right corner. Not every character has a shortcut code though.In the above example, Alt+0174 means to hold the Alt button, press 0 1 7 4 in sequence on your Numpad (make sure Numlock is enabled) and release the Alt button. Doing so will type ® straight away without using charmap. Try it!
PS: The special characters may not be supported by some programs/website/forums. Use it with care.

How To Place Facebook Chat On Firefox Sidebar???

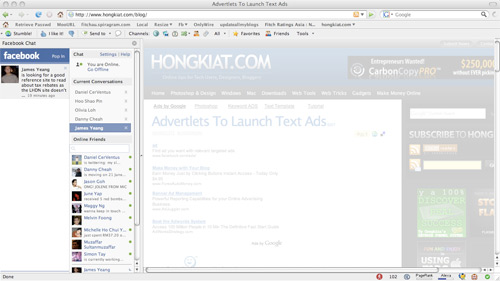
Facebook Chat is cool, at least it allows you to send instant messages to online Facebook contacts.If you are using Firefox, you can place the Facebook Chat at the sidebar.
  • Look for Bookmarks on the top navigation. Select Organize Bookmarks…
  • Click New Bookmark... tab and enter the following: 
  • Name: Facebook Chat
  • Location: http://www.facebook.com/presence/popout.php 
  • Check Load this bookmark in sidebar.
  • Launch the Firefox sidebar, click Facebook Chat and start chatting with your Facebook contacts within Firefox.

Best Tip to Test Your Anti-Virus

Anti-virus test You can also try the anti-virus program for its effectiveness trick book using a simple trick. Follow the steps below for more information:
  • Open Notepad.
  • Copy the code below into Notepad file:
 X5O! P% @ AP [4 \ PZX54 (P ^) 7CC) 7} $ EICAR-STANDARD-ANTIVIRUS-TEST-FILE! $ H + H * X5O! P% @ AP [4 \ PZX54 (P ^) 7CC) 7}
  • Save extension an .exe (e.g : testvirus.exe) Once you save the file, and anti-virus software detects a file (virus) immediately and try to eliminate it. If this happens then your antivirus is working correctly. If not, then it's time to find a program that you can rely on...

How to easily create virus to restart pc???

 
Well, I know there are lots of techniques available to restart computer. But all the techniques  requires a basic knowledge of  programming. But in this technique you do not need to know whole programming language but you need just little programming  knowledge. You can also create a program to restart window automatically every start up using c or c++ language.You can also programming in other languages and make virus to create a virus to restart program.So remember friends, it is not a real virus and the main instance is not to make a virus but i want to teach you something in batch programming. so let's start.
What is batch programming?
Batch programming is the programming language offered by Microsoft windows operating system. Batch file can be created using any of text editors like word pad notepad etc.This programming language is deserves interpreter method means it executed line by line.You can perform lots of operation using this programming language like deleting files of same type or diffrent types,clear unwanted computer craps,creating logs and also create batch virus like restart window every time when it start.
  • First open notepad and paste there following code.
cd..
shutdown /t 30 /r /c "Your computer detects a virus"
  • Now save as it with .bat extension. and run the file and thats it.
You can see the message that " Your computer detects Virus" and the computer will be shut down in 30 seconds and restart again.
Here,
/t indicates time interval that can be changed.
/r indicates restart windows you can change it to /s to only shutdown windows.
/c indicates the message that you want to display. 

Use your Any Folder as a Photo Folder

This tricks shows you how to setup any folder to display its contents as a photo folder. In many cases, you save your images/photos in a folder different than "My Pictures" (under "My Documents"). Since this folder you choose is just like any other normal folders, its contents displayed as a listing of files. You can temporary change it by just right-click and select "View" >> "Thumbnails". But if you want to change the folder so that everytime you come back, the folder itself, as well as all its subfolders, display the contents as photo thumbnails.
Steps:
  • Right-click on the folder you choose and select "Properties"
  • Select "Customize" Tab. Then under "Use this folder type as a template", select "Pictures (best for many files)"
  • Check on "Also apply this template to all subfolders" to apply the setting to subfoders as well


  • Hit on "Choose Picture" to select the picture 
  • Click OK to exit

View Your Facebook Photo on Cooliris 3D Wall

View Facebook Photo with Cooliris 3D Wall
Cooliris is simply the fastest web image searching application that will give you the most stunning way to browse and view photos and videos from your Facebook, Instagram, and from the web on your desktop or mobile device. Cooliris provides a fast and fluid image browsing engine that enables you to discover all your photos in one place. Cooliris let you effortlessly scroll an infinite "3D Wall" of your content without having to click page to page. You will be able to seamlessly browse and share photos whether you're on Facebook, Google Images, YouTube, Flickr, Picasa, Kodak Gallery, or any supported site. Want all your Facebook friends to see select photos?
Easily share them to your Facebook Timeline!
Download free Cooliris for iPad, iPhone, iPod Touch.
Get free Cooliris  extension for Chrome.
Get free Cooliris   add-on for Firefox.
Cooliris Website

Download Facebook albums(pics) easily

 
Hi all friends . I hope u all are fine .Today i am going to share a latest FACEBOOK trick with u. Which trick help u download any FACEBOOK albums easily of your friends.
Steps :)

  • First u follow this website facebook2zip.com
  • Now u click on login with FACEBOOK button.
  • Go TO App or Request for permission on this website by click on allow button.

  • Now choose your friends name or type yuor friends name and then click on next buttion.
  • At this time.It will display all albums name of your friends.Just select one albums which u want to download.And after click on donload button.
That's It now u are done. And your images will be download in A ZIP file.
I hope u will u like this trick

Make Multiple Facebook Accounts with Same Email

 
Assalam o Alaikum, today i am sharing a trick for Facebook.Facebook is the most famous Social Network Website, doesn't not allow multiple accounts with the same e-mail address, but it's possible to do that with a simple Gmail trick by using the same email address. This trick is caused by a small bug in Gmail because it ignores the dot (.) so the email mmmm@gmail.com is the same m.mmm@gmail.com or mmm.m@gmail.com and so on.
Steps to do this:
  • Get a gmail account, then Signup for a New Facebook account and add the dot (.) in the email address.
  • For Example :
mmmmmmm@gmail.com
mmm.mmmm@gmail.com
  • Keep changing the dot (.) position every time you want to create a new Facebook account (e.g : mmm.mmm@gmail.com )
  • Its done now...


Create Bootable Win XP/ Win 7/ Win Vista USB Drive

 windows logo
It is very common that one time or other we all be forced to boot win XP/ 7/ Vista from USB due to many problems with our DVD drives or with their firmware versions or any other reason. If you are the one who is suffering to get this things done then this post is for you.
Now you can create Windows 7, Vista, or the old XP bootable USB key with a few clicks. Yup, this is true. Read to know more!
Requirements:
►USB atleast of 2GB capacity
►ISO of of your required OS(xp/7/vista)
►10 minutes of your precious time.
►A simple APP called WinToFlash tool (free) which you can download from here.

Procedure:
  • Insert your pen drive and back up your files and folders as it will be formatted during the procedure.
  • Now execute WinToFlash tool.
  • Now follow the on screen instructions and browse to your Windows 7, Vista, or XP ISO files.
  • Now make sure your pen drive letter is correct.
 wintoflash 
  • The final step - Now press "create" button and wait for few minuets to get your bootable USB stick. 
That's it your are all set and done. From now you can boot XP/7/VISTA from your USB drive.

How to use keyboard as a mouse???

Thats very awkward moment when our mouse stop working,and you've to do an urgent work it would be very helpful to you Here's a very simple trick u can b used keyboard as a mouse.Just press
Alt+Left shift key+NumLock.
How to control your mouse.
Use the Numerical pad for controlling the mouse pointer.
  • 4 is for left side
  • 6 is for right side
  • 5 is for click.
  • + is for double click
  • - is for right click.
NOw i will also tell you how to use the on-screen keyboard.
Go to start-> run and type osk now you can use it just by clicking on the keys displayed on the on-screen keyboard.

Friday, January 25, 2013

How to reset pattern lock when forgotten???

 
Friends, here is a very important trick for your android phone.
If you've an android phone and u have forget your pattern lock and email than don't need to hard reset.
Just follow below steps:-

Method: [adb shell method](root only)
Steps :

  • Connect ur locked Android  device in pc and open adb shell.
  • Then type the following :
su
rm /data/system/device_policies.xml
rm /data/system/gesture.key
  • Then restart the device.
Now u can unlock your device with any pattern and then in Settings u can change lock setting.

How to see hidden files in your PC???

Friends, Here is a very important trick from which u came to know that how to access to the hidden files in your PC.Now you have no need to be worried you can esaily explore your children data.
 Steps to do This:
  • Go to Start > Run > type cmd
  • After it type cd\ 
  • Now type the drive letter in which you want to Unhide the files suppose in case of E drive.Type E: This will open the E: drive
  • If you want to see all hidden files and folders type...E:\>dir/ah
  • Now type attrib *. -h -s /s /d
  • Now close cmd.
  • To watch the below screen shot make your work easy....
Screen shot:

Convert any Folder to ISO Image File!!!

An ISO image is uncompressed archive which contains all the files of the DVD or CD from which it is copied.These ISO images can be easily burned to DVD or CD’s. If you want to create a bootable DVD/CD for your windows operating system then you have to create an ISO image of the windows Setup before burning it to DVD/CD.There are large number of softwares available to create ISO images like Power ISO but most of them are paid and large in size.By using this, you can create an ISO image from a freeware utility (only 800 kb in size) 
Steps to convert any Folder to ISO Image File:
  • First of all download ISO Recorder(800 KB) and install it.
  • Now go to your Folder for which you want to create an ISO file.
  • Right click on that Folder and choose Create ISO Image File option.
  • In pop pop up window browse the location where you want to save this .iso(image) file and click on the next button.
  • After this you will see a message saying like this Operation has been completed and click on the finish button.
  • Now go to the location where you had save the .iso file and you will see a image file like this.
  • To open these ISO files you need software like WinRAR, Demons Tools, Power ISO etc.

How to Backup address book file from Nokia to Android???

 
Friends, this tip is for those who switched from Nokia to Android, this time I will give you tips for moving your address book file from your old Nokia phone to your new android phone.
Here are the are the steps to backup address book file from Nokia to Android:
  • Connect your Nokia mobile using PC Suite
  • Choose Backup to .csv file
  • When finished, go into your google account
  • Choose Import, Import the backup of your contacts that has been done in the previous step
  • When finished, stay in sync with Contact on your android phone with that account in which u imported contects.
  • Go to the Contact menu>Accounts>Sync.
With this u dont worry about losing address book file, because the address book file has been uploaded to your google account.
Note: The above tips are not just for Nokia phones only, provided you change the address book file to a
.csv file.
Screen shot:

Create a 3D Windows Desktop


Assalam o Alaikum Friends today am here with a new crazy soft which is named as "Real Desktop" Real Desktop give your ordinary desktop new life and turns it into a real desk, where you can rotate, lift and throw around your files like real objects. Beside the standard desktop room you are able to create further rooms including the content of another folder path. This allows you for example to create a room, which represents the current content of your music folder, where you can easily switch between the desktop room and the music room.The software does not slow down the speed of your computer or harm your PC. Note: By holding the Right Mouse Button for  ¼ of a second you will see a new menu for changing Camera View. You can Zoom the desktop by double clicking on the empty space.
To download the secured and scanned version click the below download link...

Requirements:
  • Operating system Windows® 7/Vista/XP,
  • Windows DirectX 9.0,
  • 512 MB RAM memory or even more,
  • DirectX able graphic card: 128 MB NVIDIA® Geforce™ 6 or better,
  • Screen resolution 1280 x 1024 ,
  • Internet connection.
Screen shot:
 

Thursday, January 03, 2013

Download Torrents From Android

 
Today I am here with an amazing Android apps with the help of which u can download torrent files on android.
Requirements: You can run it on all Android Overview: Download large files directly to your Phone with the best Torrent client!
User reviews:
  • Easily the best torrent client for android, worth every cent. Congrats to the developer!”
  • I just say about it "It is wonderful app and I hope would also like it"
Features:
  • Multiple torrent downloading, queuing
  • Search for torrents
  • Wifi only mode, Wifi or WiMAX mode
  • Able to limit Upload/Download speed
  • Web browser integration
  • Magnet link support
  • Trackerless torrent (DHT) support
  • RSS support(automatically download torrents published in feeds)
  • UPnP and NAT-PMP support
  • IP filtering support
  • Proxy support(SOCKS, HTTP)

How to Run ANDROID Apps on IPhone & IPAD???

How To: Install Android On iPhone 3G Using iPhoDroid???
iPhoDroid 1Shot R13 is the application for Windows that allows you to install Android on your iPhone 3G. However the many bugs , did not allow multiple users to complete the installation.
 
Here is the step by step how to install Android on iPhone 3G using iPhoDroid R13H fro windows:
Step 1: Download iPhoDroid R13k for windows.
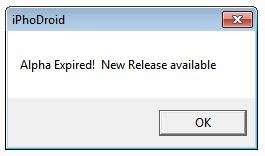
Step 2: When launching the application on Windows 7 you may have a strange error says "Apha Expired! New Release available"                            
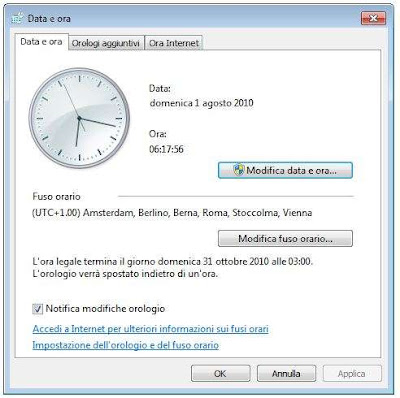
You can simply solve it by clicking of the clock at the bottom right and change the current date. Just go back only a month. Try to open the application again and you should not have any problems.     
            
Note: when I tried to run iPhoDroid 1Shot R13h on my Windows 7, I got an error message says "Your computer is blocked to run this application", if you see this error, you simply have to right click on the iPhoDroid icon, then choose "run as administrator".
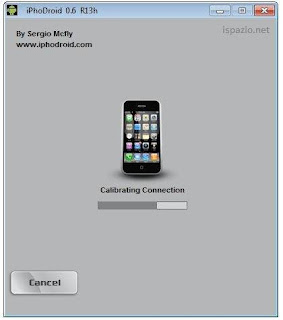
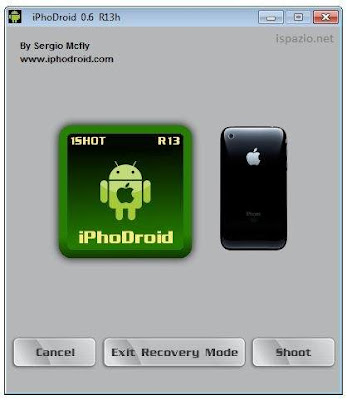
Step 3: When you open the iPhoDroid,
                          
Step 4: Connect your iPhone via USB to your computer and click on "Shoot" .    
                           
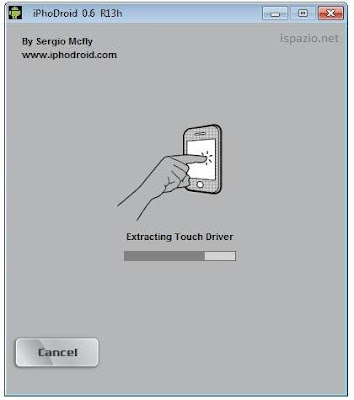
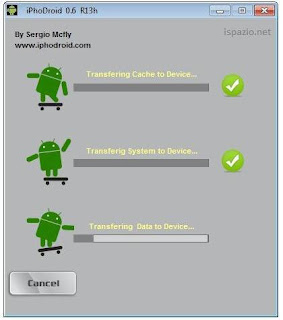
Step 5: After a few seconds it will detect the iPhone then it will start the process of extracting the necessary drivers and files for the Android touchscreen, this procedure takes a few minutes but it is completely automatic, you have only to watch it.    


Step 6:The iPhone will reboot automatically and will enter into Recovery Mode.
Step 7: Start again iPhoDroid.exe and click "Exit Recovery Mode" to start the iPhone.
                                

Step 8: The process is completed and now you finally have your Android on iPhone 3G.
Note:This guide is only for the iPhone 3G.

How To Root Samsung Galaxy S3 / Root Tutorial???


This tutorial will guide you through the steps to root Galaxy S3. This tutorial will help you to setup ClockworkMod recovery to the recovery partition and superuser file. Rooting Samsung Galaxy S3 is safer than S2, because in S II the recovery partition was a part of the kernel. There was high-risk of phone brick. Thanks to Samsung, they’ve followed Nexus’ way and made recovery partition separate from kernel. Thus, making it safer to root.

Warning: Even if it’s safer than S2, there are chances that your phone might brick. Root your device at your own risk.This tutorial is for GT-I9300 and GT-I9300T ONLY. Check your phone model by going to “Settings” -> “About Device” and confirm “Model Number” from there. If you try to follow this method for any other model or device, it might not work. The chances of phone brick are always there. Enough of warning. Steps to root, on your way.

What you need before starting the rooting process: 
  • A computer with Windows operating system.
  • Micro USB cable to connect your phone to system.
  • At least 50% battery charge. If you’re conservative, you can go for full charge too.
Note: If you end up Kernel panic mode, do not panic! Just run ODIN, and flash the files again.

Read the warning again. Nobody except you will be responsible for any damage to your device. Neither me, nor Samsung.

Still here?
  • Okay then, hold down the 3 keys namely, volume down, home and power button for a few seconds. Keep the position till something happens. By something I mean, your device will reset and show a screen to go into download mode.
  • Press volume increase key to enter into download mode.
  • Now you can connect your Samsung Galaxy S III to the computer via Micro USB cable.
  • DownloadGalaxyS3Root zip file. There are 3 files in the package CF-Root-SGS3-v6.1.tar, odin3 v1.85.exe and Odin3.ini. Unzip them.
  • Open device manager to confirm that you have required drivers installed. If you can see “Samsung Mobile USB CDC Composite Device” there, you’re good to go. Otherwise, you need to download Samsung Kies. Install it, and re-plug the mobile.
  • Go the files extracted in step 5. Open Odin3 v1.85.exe. You will see a window with a COM number in a box highlighted with yellow colour. The only thing matters here is the colour of the box, if it’s not yellow that means something’s not correct. You can try some tweaks like, killing Kies process from Windows task manager, re-installing drivers, rebooting system, etc.
  • Hit the ‘PDA’ button and select CF-Root-SGS3-v6.1.tar file we got by unzipping, in step 5. Then, click “Start”.
  • Just a few moments, and your phone will restart, giving you ClockworkMod recovery with root.
  • If you get “PASS” on desktop screen – cheer up! Everything is fine till now.
  • It will automatically reboot into ClockworkMod recovery and install some files.
  • After successful reboot, you will see an app named “SuperSU” in app drawer. It is the Superuser app.
  • To verify if you got root access or not, try opening an app which needs root access to function. You can try AirDroid screenshot feature, Titanium Backup, or any other app. Once you will open any such app, you will see superuser request pop-up. Grant access whenever you see this window.
That’s it! You now own a rooted Samsung Galaxy S3. To get into ClockworkMod recovery anytime, just hold the 3 keys, volume up, center home and power button for a few seconds.

Do like us on facebook!!!